DIY Wired speakers into bluetooth
DIY Wired speakers into bluetooth
One thing I lacked after switching to a setup without my external monitor (in Asahi DP over usb-c just doesn’t work; by the time of writing still no audio over hdmi) was speakers. They are connected to the monitor and are used through a display port from my desktop and my previous laptop. I could ofc connect them to the asahi laptop using the 3.5mm jack but that would require re-wiring which I’d like to avoid. Or I could switch the speakers set to another one with bluetooth support. But my current speakers are good enough so I decided to try to mod them (real reason btw) by adding the bluetooth support.
After a very quick (read lazy) research I chose RUIZHI Bluetooth Empfängermodul
Specs:
- Bluetooth version: 4.2 (Bluetooth 5+ would have somewhat better range and stability in a condensed RF environment but for me 4.2 is totally fine)
- Two kinds of power input:
- 5–35 V terminal input. Wide enough range to work with almost any speakers, mine are 17 V. These terminals are also convenient to use (quickly connect/disconnect wires) but I wouldn’t pay for it - soldering is just fine. Also it has the reverse polarity protection - won’t instantly burn if you have red/black color deficiency.
- 5 V mIcRo-USB input (no! please god no!)
- Two kinds of audio output:
- 3.5 mm jack: standard, but will be useless in an embedded device
- 2.54 mm 3-pin audio output: with the provided cable it is the way to connect it to the speaker board.
- Dimensions: 55 × 32 × 9 mm - quite important - should be small enough to fit into the active speaker which is usually already occupied.
- Blue LED indicator: In the darkness I can see it blinking ever so slightly through the sound canal, but it doesn’t bother me.
- Foxconn Pure Gold External Antenna Interface, 5 V Pure Copper Gold Plated Power Connector - man, these guys love gold
- Operating temperature: −40 °C (dead frozen) to +85 °C (dead melted)
Though it is a very cheap one, it looks good enough for my purpose. I don’t have a strong preference here - there are several options under 10 Euros. I just didn’t want to spend a lot of time scrolling the amazon.
⚠️ Btw if you don’t want/like soldering, you can just add another ten euros to buy an external bluetooth receiver (like a UGREEN Bluetooth 6.0!!! Adapter) — it will require an additional power source and will result in more wires but it’s better than taking unnecessary risk. You have been warned.
As soon as the receiver has arrived I quickly wired it to a block of 4 AA batteries (much quicker than spending a couple of hours looking for a microusb cable) to check if it’s working. Btw the 3.5mm jack came in handy for this purpose and after less than a minute I was listening to music in my WIRED headphones via BLUETOOTH, YEAH! And the sound was actually good.
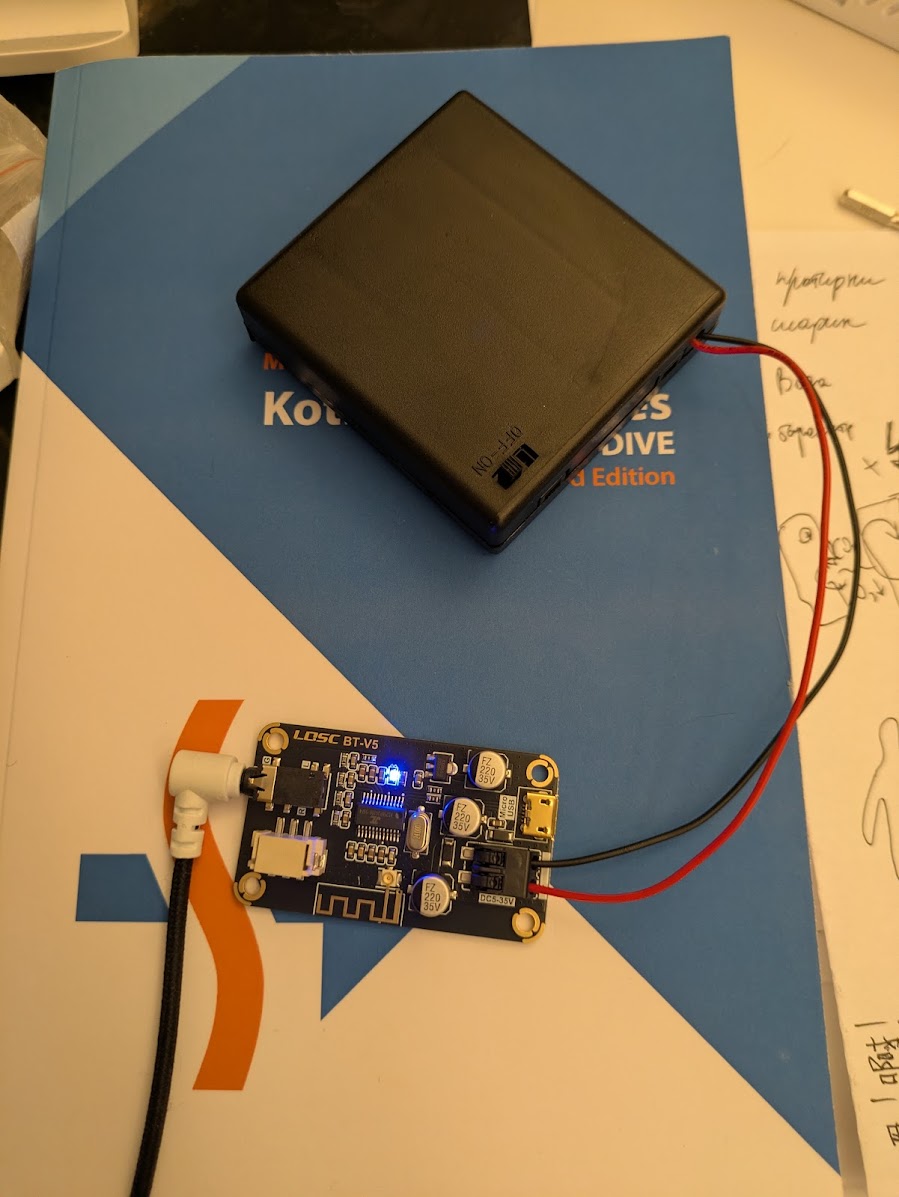
— Almost portable
Now I just need to correctly solder the power and signal wires and pack it into the speaker casing.
Power
Next step is to look inside the active speaker (the heavy one) and see if the power line is easily available, it’s voltage and how easy it is to connect to the audio input line. In one of the reviews I found that in my speakers the power unit is in a separate block (nice - less risk of touching high voltage lines) and the internal voltage is the convenient 17V. Check this voltage for your speaker set.
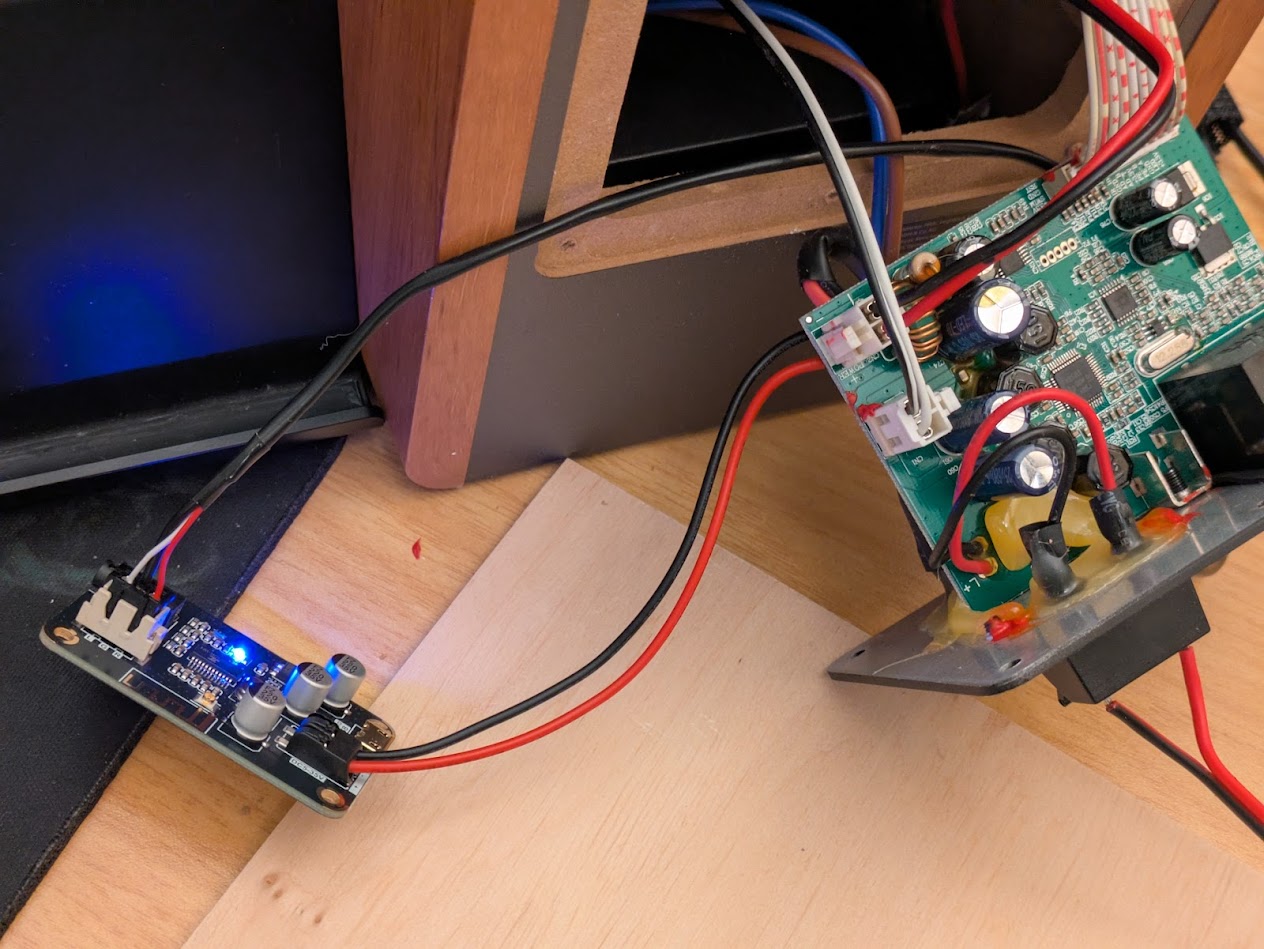
On the Edifier speakers the powerline is easily noticeable - 2-pin connector (red/black) coming from the power supply to the control board. I was able to solder two additional wires on the bottom of the board and wire them into the bluetooth receiver terminals.

— Power line in my speakers. Do not touch the blue/brown wires pair!
Alternatively you could implement this without soldering, by means of additional wiring.
Be sure that the power input is connected firmly. Give the soldered wires a generous pull to check that the connection is secure. Short circuiting on the input signal is bad but short circuiting on the powerline is a fire hazard. ⚠️
Signal
There are two inputs (AUX/PC) in the speaker set and as I learned from the speakers review - there is no active switching between them - if both supply a signal they will simultaneously play back. Still not sure if it is a feature or a bug 🤷. Anyway, in this case it looked like I just needed to hook into the AUX pins and it should just work. Again I soldered the new wires to the bottom of the board, to the pins of the AUX RCA connectors.
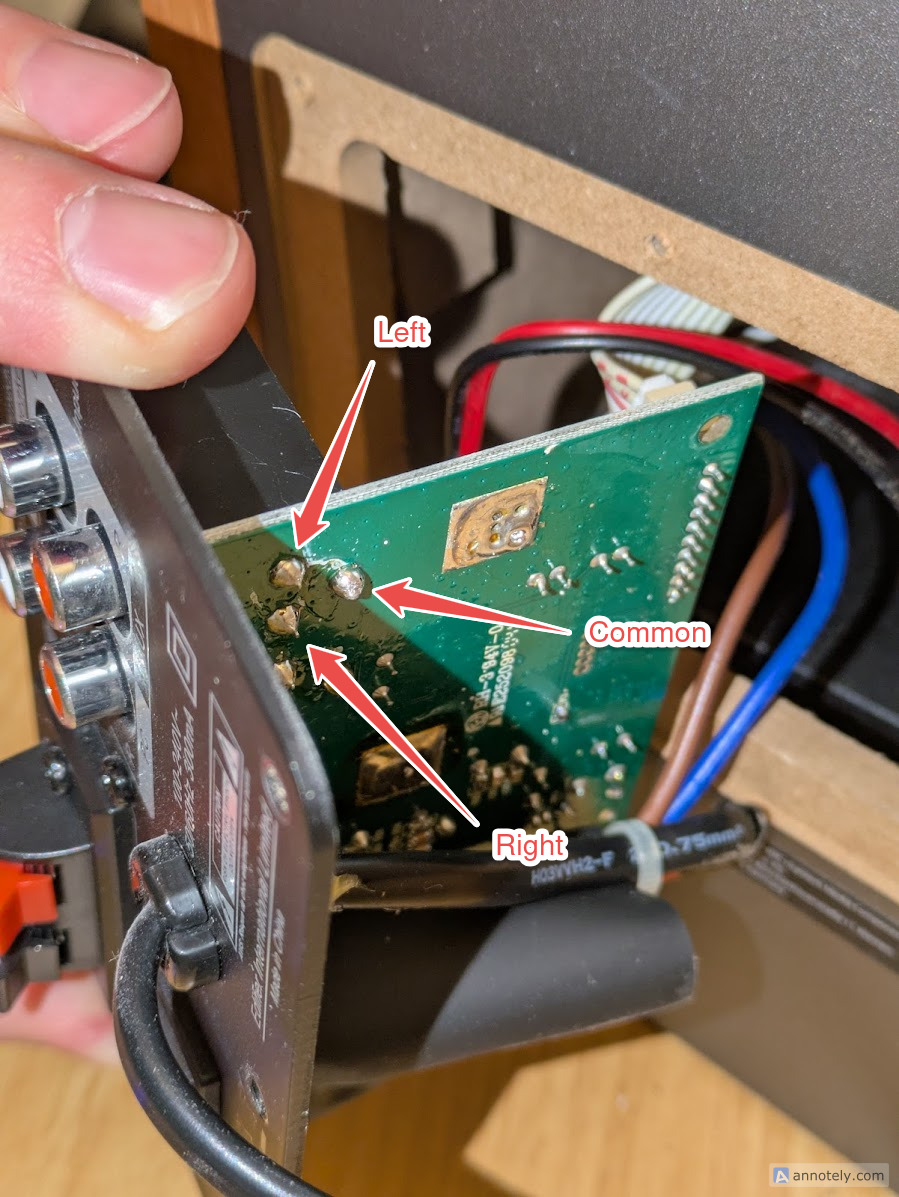
— Hm, not quite sure about left/right
Final assembly
Before shoving everything into the speaker, double check that everything still works. It did in my case. Then I managed to stick the new board on a double sided tape on the back wall inside the speaker. I was glad I used long enough wires. Should have thought about that earlier, but I was lucky.
— Final assembly
The speakers did not change visually so there is not much sense to add a photo of the finished device. But now I can enjoy the sound of Timewind by Klaus Schulze.
Speaker reviews
- RU https://www.ixbt.com/multimedia/acoustic-roundup-july-2014.shtml
- RU https://pcnews.ru/articles/ekspress_test_multimedijnoj_akusticeskoj_sistemy_edifier_r1280t-542081.html#gsc.tab=0
P.S. I was used to audio devices being analog devices, but it looks I’m quite outdated in this regard - the internals of the Edifier speakers are all digital:
- the analog RCA input signal is converted (TI PCM1808) into digital I²S.
- TI TAS5713 is a digital-input class D amplifier
- controlled by an STM8 MCU